
Even if you edit or remove outdated content from your own web pages, that information can still appear as cached data or snippets in Google’s search results for weeks or even months.
Thankfully, you can manually request for content to be scrubbed by using Google’s Content Removal Tool!
Simply make a request for Google to remove any outdated content and voilà — in roughly 24 hours or so, you’ll be good to go.
This article will explain step by step:
- How to use Google’s handy Remove Outdated Content Tool for pages and images
- How long it takes Google to remove outdated content upon request
- When to use the tool and when you shouldn’t
- And how to efficiently monitor your web page
Let’s dig into the details of removing content with the help of Google.
What is the Google Remove Outdated Content Tool & Where to Find It
To summarize, the tool is used to remove outdated content from a page appearing in Google’s search results.
Ready to use the tool? You can find it in Google Search Console. It’s configured as a simple form so making a request is a no-brainer.
Alternatively, you can type “remove outdated content tool” into Google, and we’re confident that the SERPs will get you where you need to be!
Keep in mind that all submissions are manually checked, so there will be no immediate action. Google will remove specific content and related caches over several days or weeks (depending on the site’s crawl rate).
If you want to remove a specific image the process is slightly different (we’ll get to that shortly).
When to Remove Outdated Content from Google
You should only use the Google Remove Outdated Content Tool under the following circumstances:
- You do not own the site where the content appears but it has outdated information about your business. If you do own the page, you can ask Google to recrawl the page or hide the page.
- The pages or images have already been removed from the web or significantly changed from the current (your) version.
When & Why You Should Remove Content
Misinformation spread by outdated content can hurt your business, especially if you are in the food or medical industry where up-to-date information matters.
Here are some more specific situations where you’ll want to remove content using the Google Remove Outdated Content Tool:
- You or a client has discontinued a product/service but pages and images for it are still showing up in Google’s search results.
- Your business has changed locations or contact information.
- Promotional material (usually an image) displaying a price or offer for a product/service has changed significantly.
- The web page owner is refusing or not responding to your request to remove the outdated content.
When You Should Not Remove Content
While this tool can be incredibly useful, there are definitely some instances where you’ll want to skip using it:
- The content is still useful. If the content brings in traffic and is still relevant (and correct!), then it shouldn’t be removed in the first place. Make sure it is truly outdated or incorrect before using the tool.
- You think the information on the page or image should be removed for legal purposes. If that is the case, use the features from this page
- You are a verified owner of the page. If you are the owner, you can make the necessary changes to outdated content yourself.
- The page or image is still live and simply needs to be recrawled. You can ask Google to recrawl your URL here.
For more information, visit Google’s help center.
Ready to get started? Read on for a step-by-step guide on how to remove outdated content based on page URLs and picture URLs.
Content Removal on a Page
Step 1: Enter URL Into the Google Outdated Content Removal Tool
Go to the Outdated Content Removal Tool form and hit “New Request”.
Enter the URL of the page you want and it will analyze if it is still live.
Choose the appropriate response, then click “New Request” again.
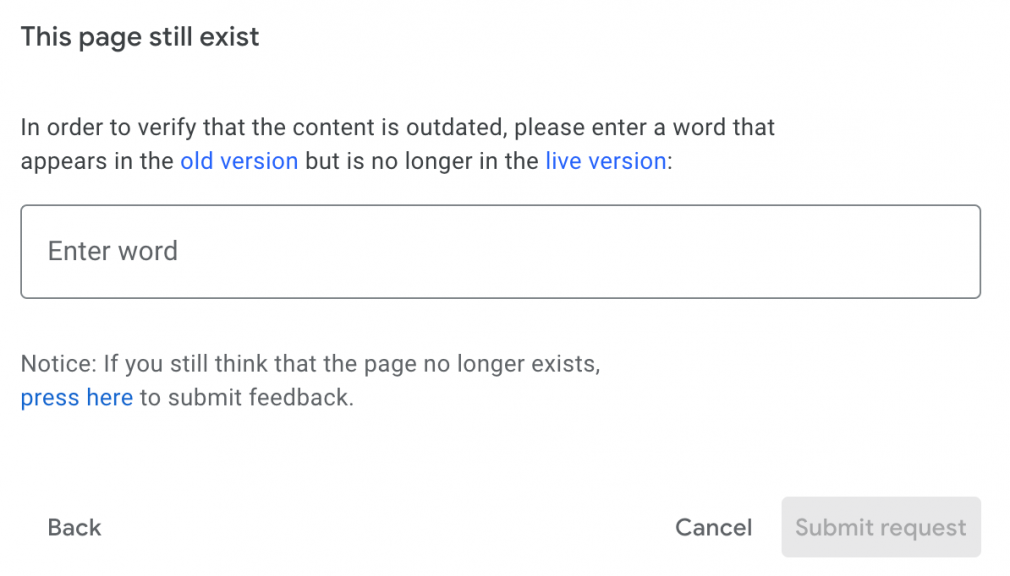
Step 2: Enter a Word That Appears on the Old Version
Enter a word or number that appears in the cached version that no longer exists on the live web.
This step helps the tool verify that you have chosen the correct page.
Step 3: Submit Request
Hit “Request Removal” for the final time. You’ll get a prompt saying Google has received your request.

After you finish submitting your request, you can keep track of its progress in Google Search Console.
But how long does it take for Google to remove outdated content upon request?
Typically, these requests take about 24 hours to process.
You can keep track of your request to see where it’s at in the process. It will be listed under one of the following categories:
- Pending: Currently being processed (can take as long as a few days)
- Approved: Approved and live on the SERPs
- Denied: Denied for one of these reasons
- Expired: Request approved but expired (requests expire after 180 days since request was approved or if the URL doesn’t exist anymore)
- Canceled: Request canceled for requesting user or a verified site owner
Content Removal for an Image
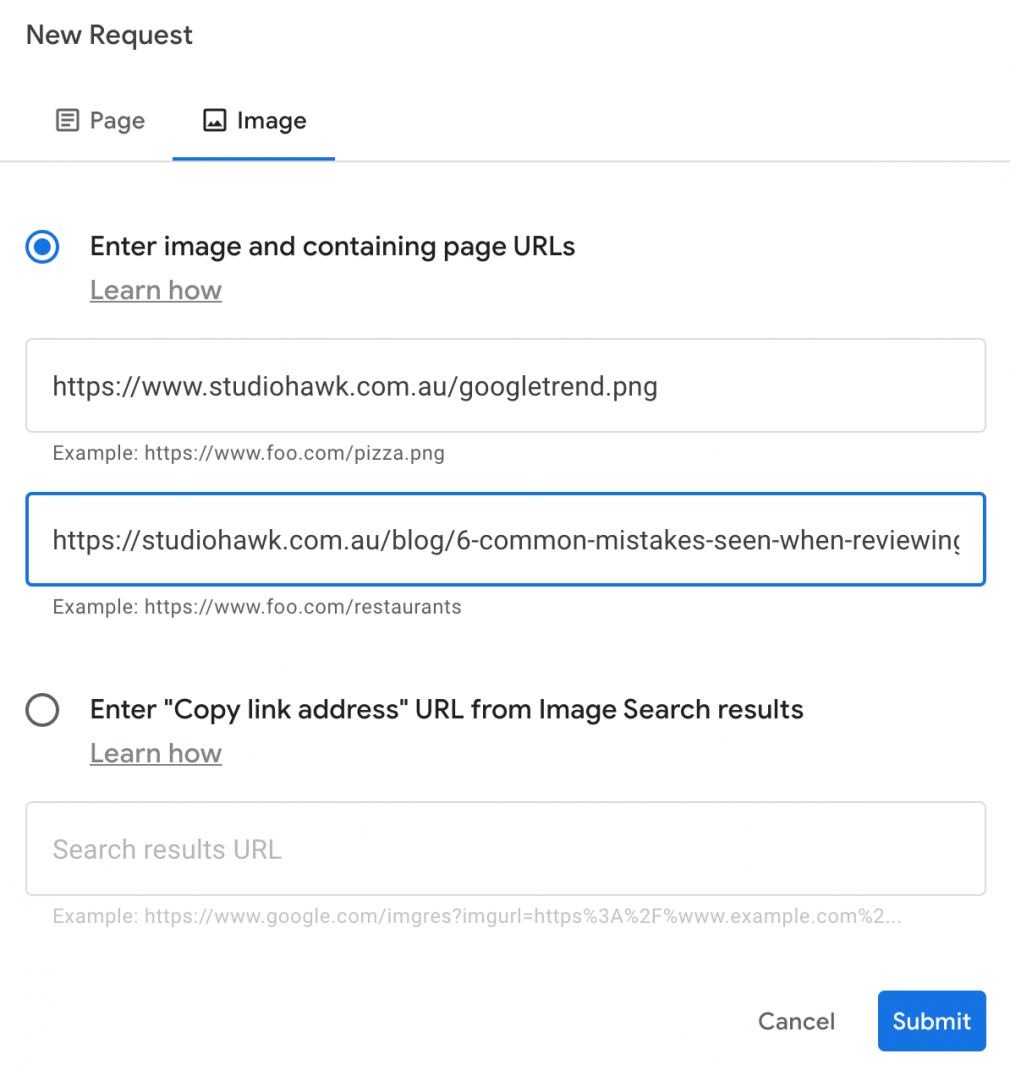
Step 1: Enter Both the Site URL & the Image URL
Go to the Outdated Content Removal Tool form and hit “New Request”. Next, click on the “Image” tab.
Enter the image URL along with the page URL.
Choose the appropriate response and click “New Request” again.
Step 2: Submit Request
Hit “Submit Request” for the final time. You’ll get a prompt saying Google has received your request.

You can monitor the removal status in Google Search Console just like when you’re removing a page.
Monitoring Your Content
While you’ll never be able to have complete control over what others choose to write about your products and services online, you can ensure that your own content is up to date.
You can use the Content Audit Tool to easily monitor your own website content and remove anything outdated as needed.
Ensuring your content is up to date is important; by providing the most accurate information about your business, you’ll maintain (or build) customer trust.
Learn how to use the Content Audit Tool for monitoring your own site below.
How to Use the Content Audit Tool
The Content Audit Tool is designed to audit content within the subfolders of a website and provide data on a page’s performance.
The tool currently has the following limits for each Semrush subscription level:
- Free: 50 pages per audit
- Pro: 50 pages per audit
- Guru: 20,000 pages per audit
- Business: 20,000 pages per audit
Configuring Your Content Audit
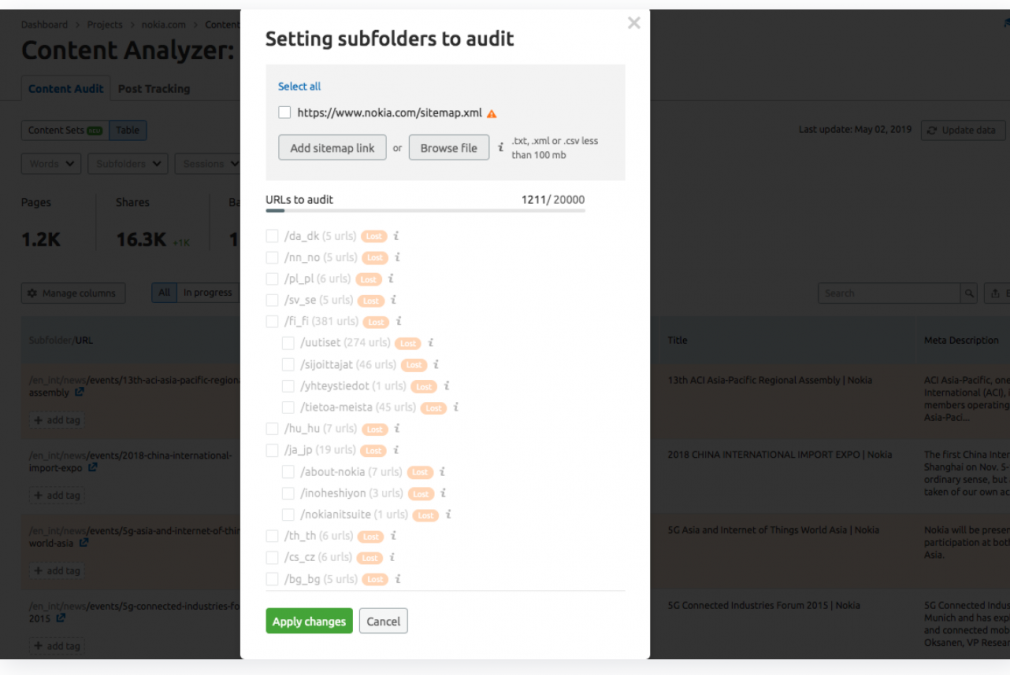
Once you open the tool, it will analyze your sitemap file and display all URLs that you have sorted into subfolders.
Select the subfolders you want to audit by checking the relevant boxes.
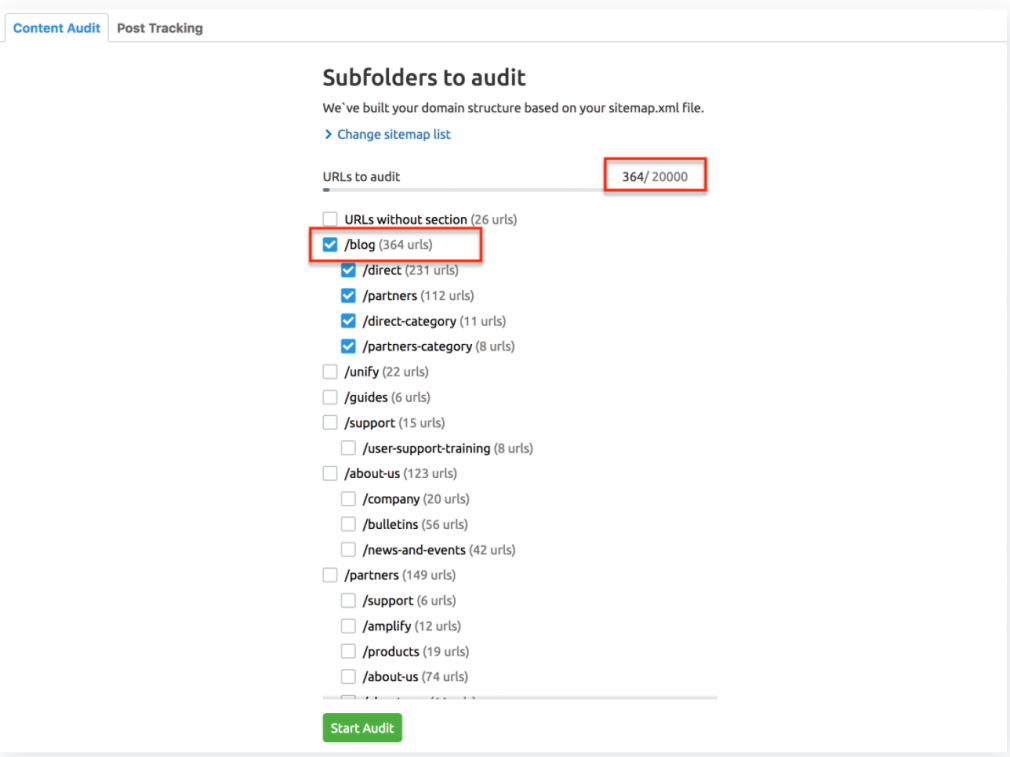
If for some reason we can’t find the sitemap from your URLs or your robots.txt, you will be asked to provide a link directly to your sitemap.
If the sitemap is in progress or inaccessible, you can submit a list of URLs for analysis. The file for upload should be a .txt, .xml, or .csv file and be less than 100 MB in size.
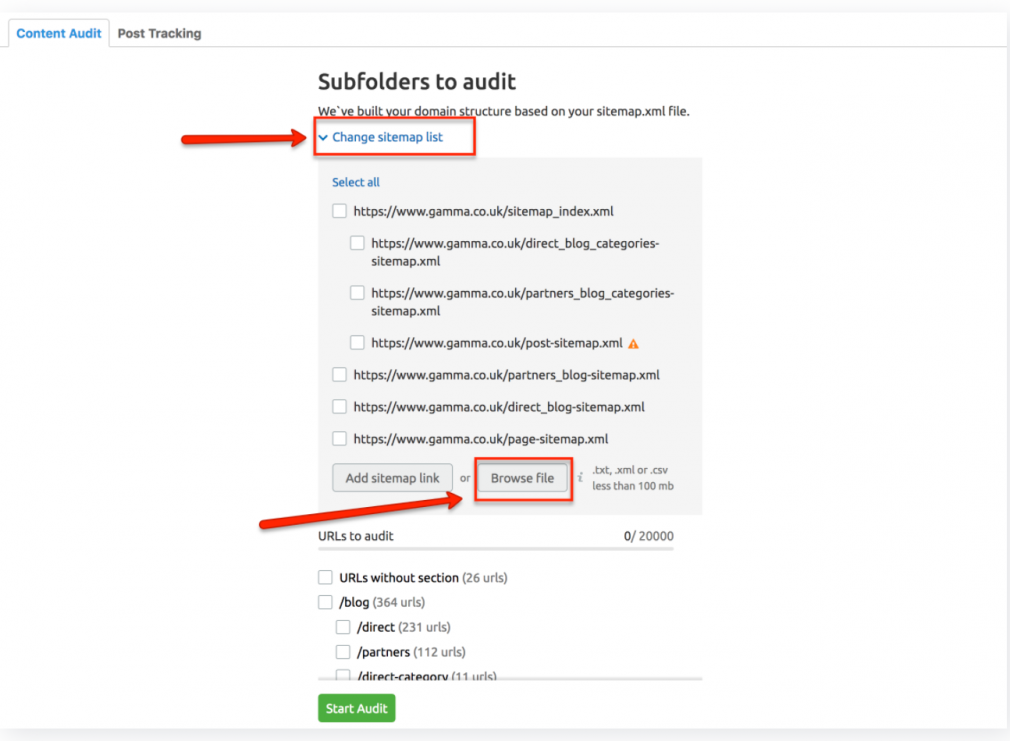
If you’d like to change the scope, update the sitemap address, or upload another file, click on the “Settings” button and select “Restart Audit”.
You will be brought to the main screen of the tool where you can re-enter the data for your audit.
Analyze Your Content in Sets
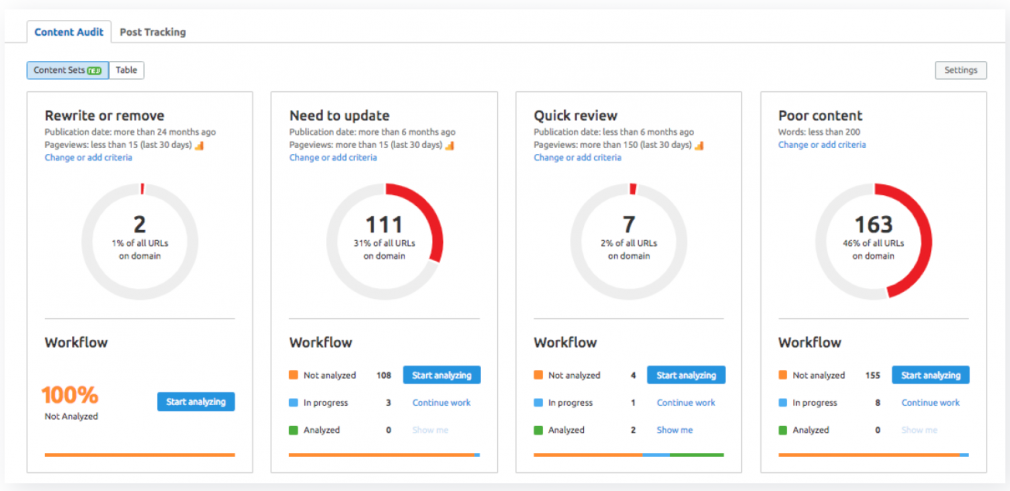
The “Content Sets” tab will be available after you connect your Google Analytics account. This section categorizes your content into four areas depending on how users interact with it:
- Rewrite or remove: Pages published more than 24 months ago and viewed less than 15 times in the last 30 days
- Need to update: Pages published more than 6 months ago and viewed less than 15 times in the last 30 days
- Quick review: Pages published less than 6 months ago and viewed more than 150 times in the last 30 days
- Poor content: Pages less than 200 words long
Custom Content Sets
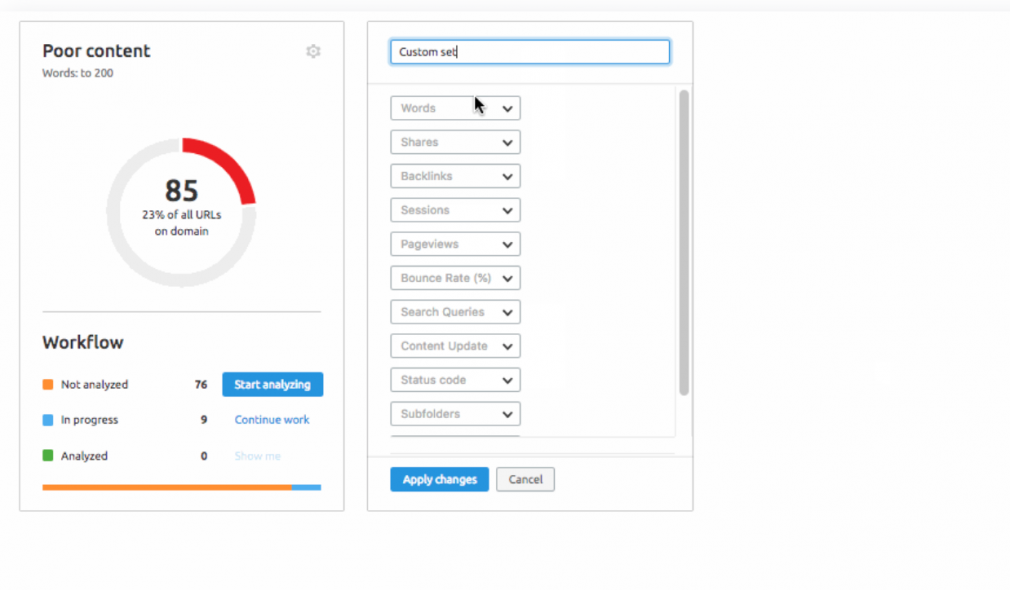
To create customized content sets, click the “add set” button.
You can then manually name this set and organize by parameters such as:
- Number of words
- Shares
- Backlinks
- Sessions
- Pageviews
- Bounce rate
- Search queries
- Content update
- Status
- Subfolders
- Tags
Customizing Your Table View
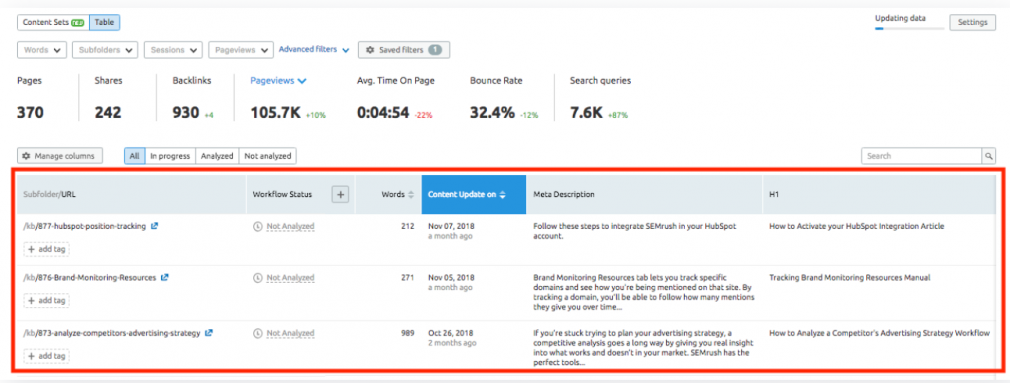
Go to the “Table” tab to get a breakdown of your website content data.
Here you can view gathered data about your Pages, Shares, and Backlinks.

The table is also customizable. Use the “Manage Columns” drop-down to remove any unwanted columns from your table.
Additionally, you can add custom columns to the table by selecting the “Add Custom Column” button.
Sort & Identify Weak Content
You can use filters to accurately sort specific fields as another way to search and prioritize weak content.
Select “Save Filter View” when creating a new filter to save several custom search tags.

Set Tasks & Track Progress
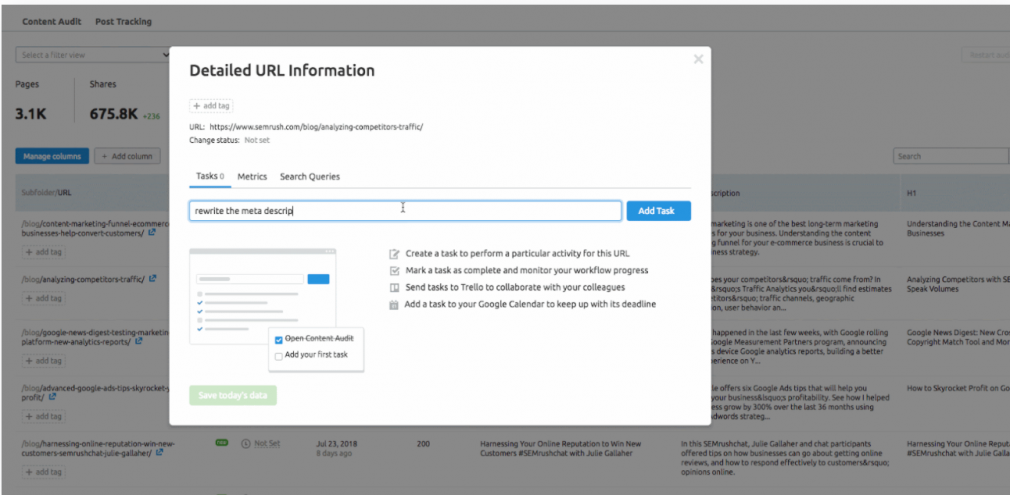
Here you can create and assign “Tasks” for each page.
Monitoring your content is crucial, but it’s important to actually take action on any issues or opportunities that you find!
The specific task goes into an “In Progress” workflow status and the current version of the content will save automatically.
You can track the progress of the task by opening the “Metrics” tab.
If no workflow has been created for a specific URL, it will be categorized as “Not Set”.
Once you start to make progress, you can update the task to “In Progress”.
When the task is complete, label it “Done”!
Exporting Your Content Audit Results
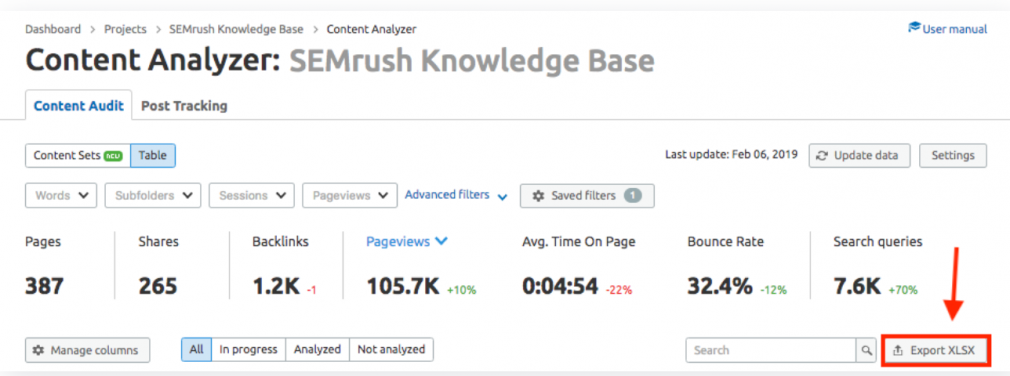
To export the audit, simply go to the “Table” view and find the “Export XLSX” button in the bottom right.
This will provide a spreadsheet of all your pages to audit and their accompanying metrics.
Key Takeaways
- Google’s Remove Outdated Content Tool is designed for use after you have removed the relevant page/image from the live web. It will then remove content from cached data and snippets appearing in Google search results.
- Examples of using the tool: You have discontinued a product/service, promotional material has expired or significantly changed, your business has changed addresses or contact information, or a web page master isn’t responding to your requests.
- Don’t use the tool if: You are the web page owner, you think the content needs to be removed for legal reasons, you want to remove personal information, or you just want Google to recrawl a page.
- It takes roughly 24 hours for Google to process your request for removal.
- The Content Audit Tool is an efficient way to audit all of your own web page’s content.
Now get out there and audit your content!

