The Page Experience Update is coming, and if you’re reading this you’re likely either scrambling to tackle the issues you’ve been ignoring or looking for some ways to enhance the work you’ve done.
Most in the industry are aware that it will start out fairly light, becoming more influential over time.
Google’s John Mueller likened it to cooking. They’re starting with just a pinch of salt, and will slowly adjust to get things right.
I see this update a lot like the HTTPS update. The day it rolled out it didn’t seem to have an overwhelming impact. But how many HTTP sites do you see ranking today?
Now, you might argue rightfully, that this may be co-relation and not causation. After all, going HTTPS is easy and all new sites pretty much just do it, and it may not be that HTTP sites were penalized out of the top spots.
Nonetheless, if you have an insecure site, you’re now up against a sea of sites with an advantage over you. It might be a small advantage, but everyone has it.
Advertisement
Continue Reading Below
I don’t know about you but if I’m running a race, I want great shoes.
They might only give me a 5-second boost over 5K, but those 5 seconds – in our context here – could be the difference between a clicked position and a non-clicked one.
So, consider what follows to be a few quick and easy hacks.
Core Web Vitals Hack 1: Cloud Flare
This one is not WordPress-exclusive.
My own site doesn’t get the love it deserves when it comes to updates. “The cobbler has no shoes,” they say. As such, it fares pretty poorly on the Core Web Vitals front.
Many may not be aware, but Cloud Flare offers a free service that includes a lot of speed enhancements.
To give you an idea, before I started down the Band-Aid path of Core Web Vital and Page Experience hacks for my site, our speed was:
After initiating Cloud Flare’s free plan and enabling the speed optimization components, we hit:
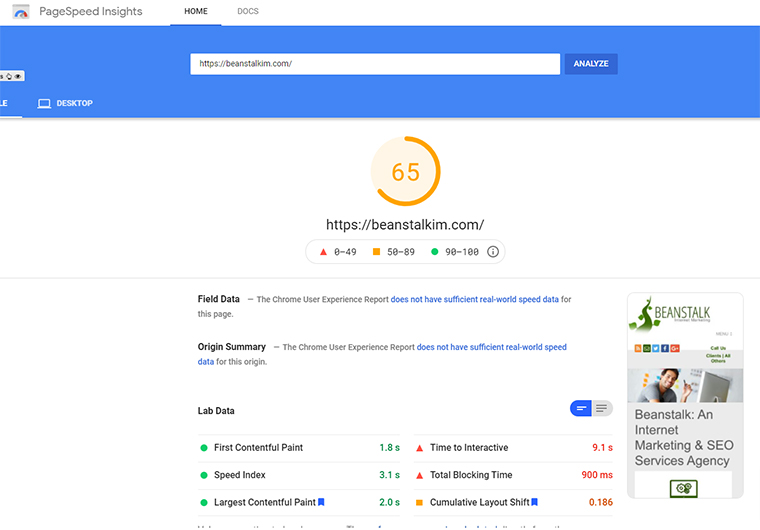
Huge differences there, as you can see. And all from about 20 minutes of work, including the account setup.
Advertisement
Continue Reading Below
After upgrading to Pro ($20/month) and tweaking all but one setting (see below) we got:
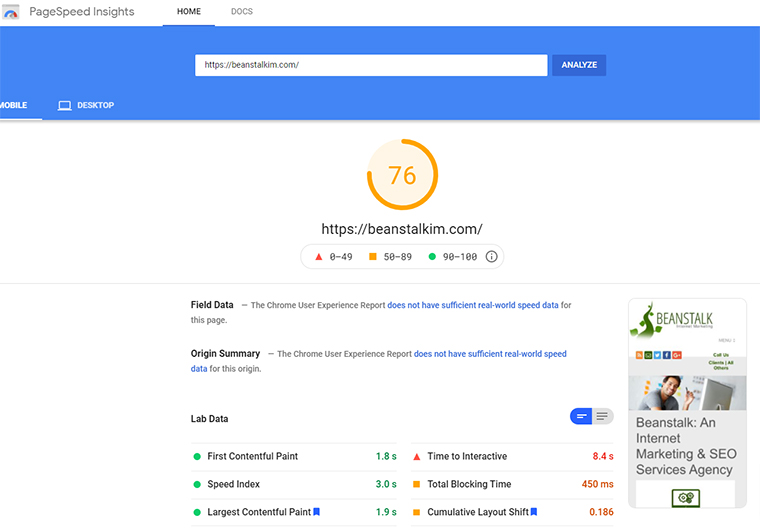
Hmm… 11 points for $20. Not bad.
The settings I enabled were:
- Polish image optimization.
- Mirage.
And because my site is in WordPress, we have the option to:

So, I installed the plugin and applied the recommended settings.
The result?
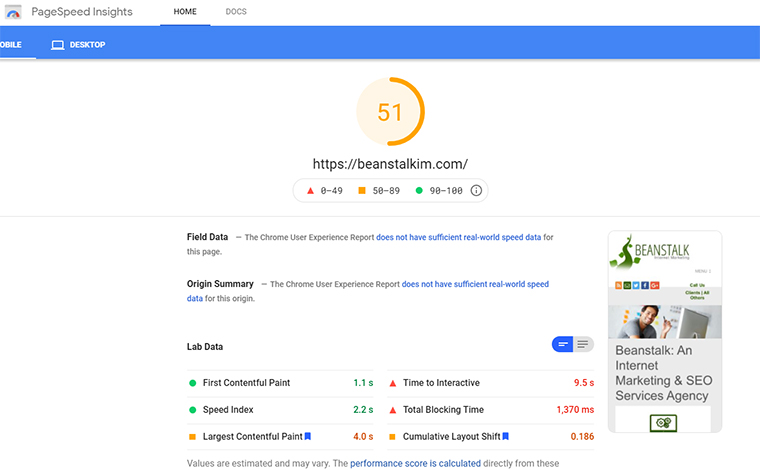
You’ll notice something funny here. The FCP and Speed Index both improved, but the LCP was decimated.
This is after multiple checks, and some resulted as high at 62 – but still.
So, I tested a few of the settings, none of them improved things, and thus I turned off the WordPress plugin and we were back in the 70s.
The Lesson?
Not everything works.
Always be testing.
Interestingly, the real-world speed from the plugin did improve. That’s not the topic here but had to be noted.
Next up…
Core Web Vitals Hack 2: Hummingbird
No, I’m not talking about the 2013 Google Algorithm, but rather the WordPress plugin.
Obviously, this section only relates to those using WordPress.
I’ve tested a bunch of different speed and caching plugins, and each seems to work in various scenarios better than others. But the most consistent, if you have a good hosting provider, seems to be Hummingbird – in my experience.
I add the hosting provider aspect, as other plugins may work better on worse hosts, but in that case, my primary recommendation would be… get a better host.
Advertisement
Continue Reading Below
Why Hummingbird?
What I like about Hummingbird is that it isn’t just a simple caching plugin (after all, we have caching from our decent hosting (or Cloud Flare) right?)
Hummingbird does have caching; I just don’t use it.
I also like that I can connect Hummingbird to Cloud Flare, to tweak some settings remotely.
Their automated optimization, in the instances I tried it in, was pretty bad.
It’s probably decent if you don’t know what you’re looking at, but if you’re willing to spend some time on the settings – you’ll do better manually with an interface like:

You may have to do some playing around to figure out which things to move inline, and which things will break functions on your site if treated incorrectly (I’m looking at you jQuery).
Advertisement
Continue Reading Below
It’s worth noting that for the purposes of this article, I have disabled all the speed boosting and caching functions from Cloud Flare while writing this section. So, the starting spot is 34 as of this writing.
I pushed all my CSS and JS to the footer and compressed it. This isn’t possible for everyone, and many sites break when you push jQuery down as a lot of sliders, etc. require it to load before they do.
Testing multiple pages including product, contact, homepages, and pretty much at least a page from each layout/template you’re using is recommended.
I should note that I did test combining the files, something I’ve never had success with, and the results were worse.
In the end, we got the score from 34 to:
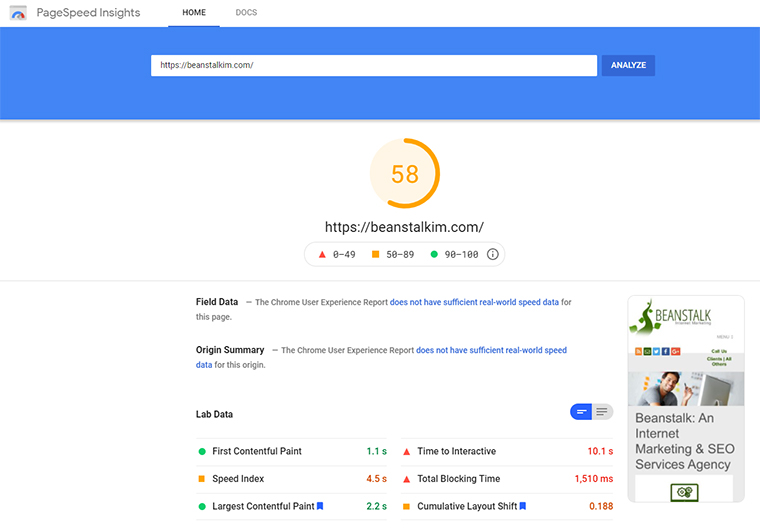
Solid improvement.
Advertisement
Continue Reading Below
My rule-of-thumb here is to get it to around 60 at the bare minimum. This allows for some error or degradation to occur without dropping it below the 50 thresholds to “poor.”
And last but not least…
Core Web Vitals Hack 3: Asset Cleanup
The WordPress plugin Asset Cleanup is another quick fix provider.
The basic function of the plugin is to allow site owners to stop scripts from loading on specific pages or sets of pages. The suggestion comes from:
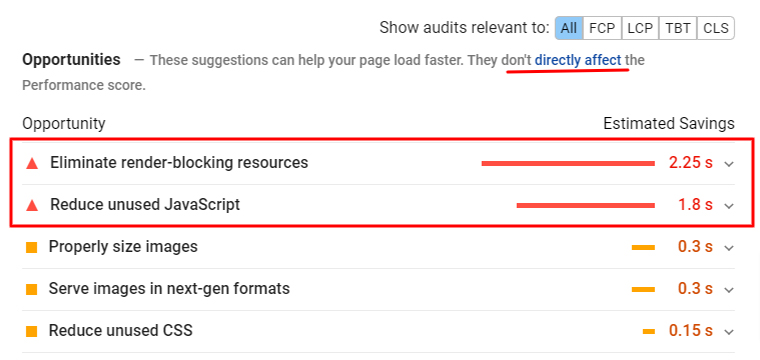
Social sharing plugins are a great example. We use them on our blog, but they load sitewide.
Advertisement
Continue Reading Below
You’ll notice it states they don’t directly impact the performance score. Let’s put that to the test.
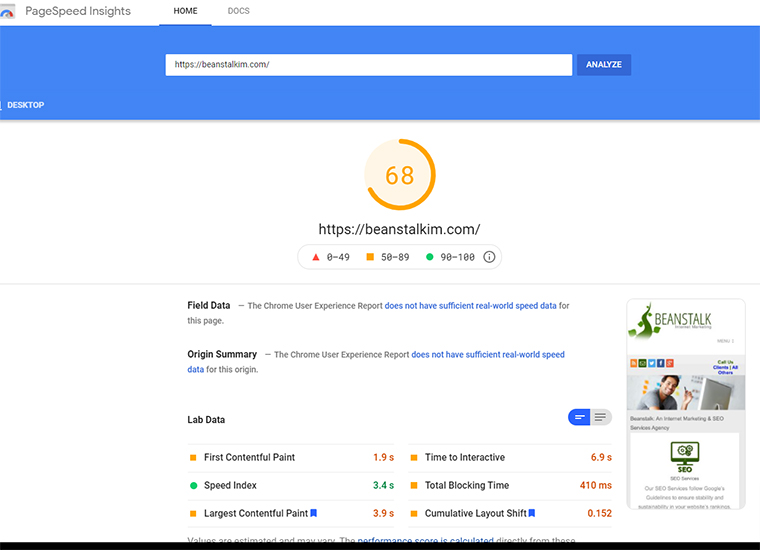
After deactivating the Hummingbird plugin, we come in with a score of 35.
Once installed and setup you will find yourself at a page that looks like:
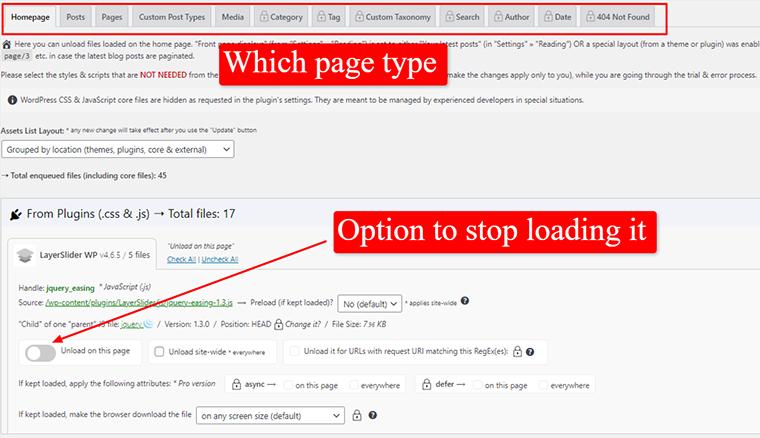
Now here’s where you might spend some time, and where their testing mode is handy.
Some scripts you’ll simply know whether you need them or not (a contact form on a page grouping, for example) but others you may not but want to test (do you really need your slider plugin on every page?).
Advertisement
Continue Reading Below
If you’re on dev or in testing mode, you may want to just disable all of them, and then enable them one-by-one, testing functionality along the way. That’s the route I went.
After about 20 or 30 minutes (which you have to do in each section, though once you’ve done one they’re faster) the speed was:
With the offending areas reaching:
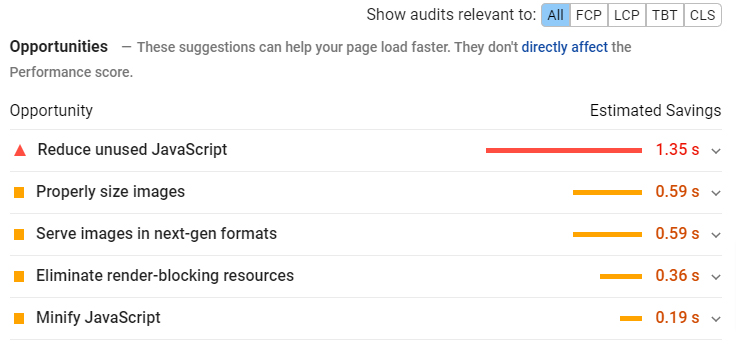
Again, solid progress.
Advertisement
Continue Reading Below
But what happens if you start…
Combining These 3 Hacks
Combining did not seem to work well, in my experience.
The scores and real-world timings got worse when any two combined. This was unexpected, as Cloud Flare and Asset Cleanup should have played well together.
But…
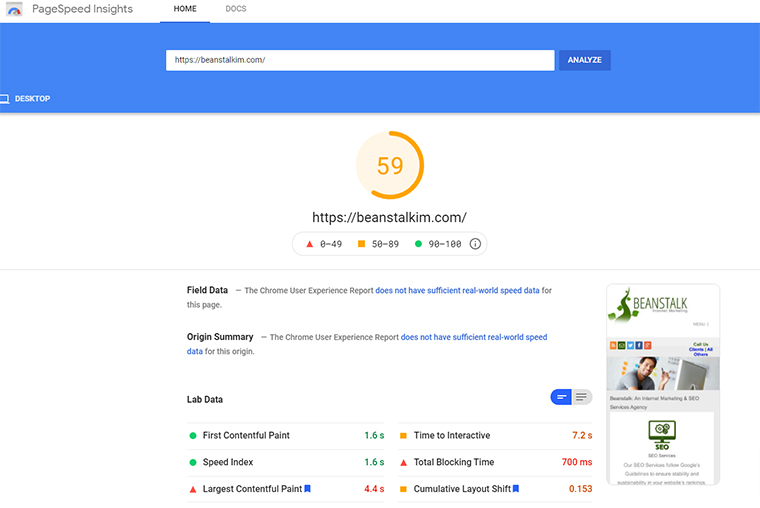
Results may vary, however, and if you’re testing each – I would suggest testing various combinations, and even other plugins if you have the time and inclination.
Advertisement
Continue Reading Below
In our case, we’ll be settling on Cloud Flare.
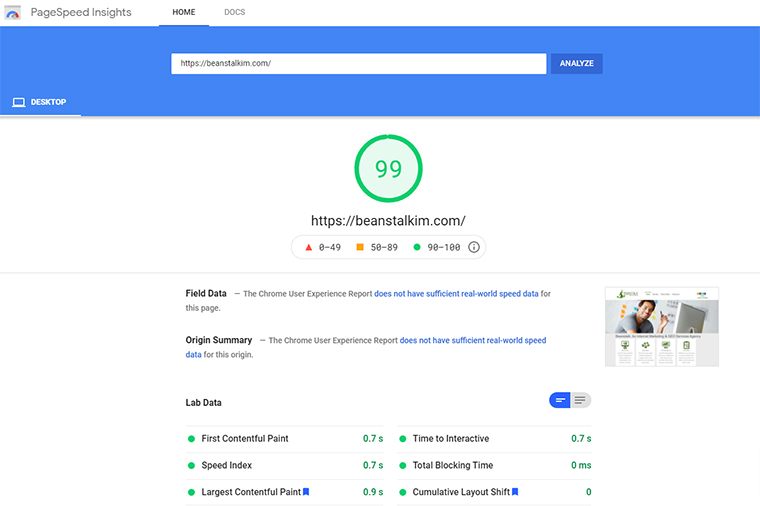
And for those curious, you may have noticed the readings above are for mobile. With Cloud Flare our desktop comes in at:
And Now to Turn Things off…
But of course, that’s not the end of the testing.
So for now I’ve turned off all the optimizations and will keep them off until September, after the rollout.
Advertisement
Continue Reading Below
Basically, I want to see how big a kick in the butt we get (if any) and then see how quickly we recover.
I don’t recommend you do the same.
Once we have that sorted out, I’ll revisit and update this piece.
More Resources:
Image Credits
All screenshots taken by author, June 2021

